Learn more about solar With
Sun-In-One™

CRI Comparison picture
Solar Energy

What is CRI?

CRI is a measure of a lights sources ability to show objects colors “realistically or naturally” compared with their true color or Sunlight. High CRI lights also put off professional level of color all the time, this used to be reserved just for professional photographers or Art galleries. Whether you’re an artistic person or not, our eyes are sensitive to light quality and color. A red shirt lit directly with noontime sunlight will render much different than if lit under a fluorescent bathroom light. The High CRI of our LED will help identify objects with the better light. Why is the Sun-In-One LED with a 95+ CRI important to you? – Displays all colors in almost natural light, making it easier to distinguish slight shades of colors and tones – See the true color of meats, fruits, and vegetables in the grocery display case – Enhances skin tone, hues, and textures, making rooms and products in them look their best – converting foot traffic into sales – Reduces eye strain in the office, workplace or at school, increasing productivity, advertising signage and safety – Easier to distinguish colors in security cameras – Less light distortion at night when driving and the colors you are seeing a closer to real colors that could decrease your reaction time while driving. What is CRI and why you want an LED with a high CRI? Color Rendering Index, commonly referred to as CRI, is a method we can use to measure how color looks to the human eyes, depending on the light source as compared to the sun. The CRI provides a scale of values up to 100, with 100 being the best color rendering light quality and a value below zero representing very poor color rendering. When a light has a CRI of 100, it means that there is no difference in color rendition between the light and the reference light (the sun). Likewise, a CRI of 75 means that the light bulb renders a 75% replication of the visible colors that the sun shows, given that both lights have the same color temperature. That is the cri of the average streetlight. Our eyes are sensitive to light quality and color. The higher the CRI value, the more accurate the colors will be.

Security Camera Power Units
Solar Energy

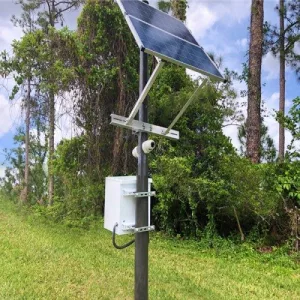
How to pick a solar power kit for a security camera

First, you need to know how much power your camera communications and switching consume and how long it needs to run daily. To determine this power, you need to know the voltage of each device, the Wattage, and the amperage. If you have two of the three, you can determine the third with an Oms law calculator. Make sure to account for the solar power kit components as well. What size solar kit do you need? This is determined by your usage. To figure it out, add the following information together so that you know your usage at each voltage: 12, 24, or 48 volts. Know the voltage and amperage of each camera, backhauling device, and recording device you want to use in the solar security camera power unit. Ensure they are compatible with the chosen solar power kit. Second, you need to know where to install the solar panel and how much sunlight it will receive. Where in the country is your installation? This helps to determine the size and capacity of the solar panel and battery. Southern Florida ( zone 5) does not get the same power from the sun as Seattle ( Zone 1). This will affect the efficiency and performance of the solar power kit. Third, you need to know what weather conditions your solar power kit will face and how durable it is. This will ensure that your solar power kit can withstand rain, snow, wind, dust, and other elements. Also, your battery is sensitive to temperature so if you are in zone 1 or 2 you need to make sure that your battery box is insulated to extend the life of your batteries. Knowing these factors lets you pick a solar power kit that suits your security camera needs.

Best Type of Storage Container Lighting
Solar lights

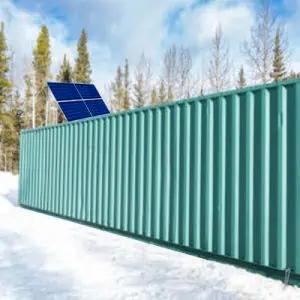
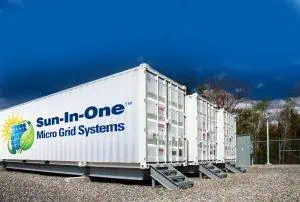
what to know in purchasing a shipping-container lighting kit

What people need to know in purchasing a Shipping Container lighting Kit? Solar shipping container lighting kits are a convenient and cost-effective way to provide illumination for off-grid applications. These kits include solar panels, batteries, charge controllers, LED lights, wiring, and mounting hardware. It’s crucial to know what you need to ensure efficiency when purchasing such a kit. Some of the information people need to know when looking for a solar shipping container lighting kit are: The power output and efficiency of the solar panels: (21% is Best in the Market) The battery capacity and lifespan of the batteries. There is a 5-year warranty on AGM batteries and 7 years on Lithium batteries. You need to store your loads for at least 3 days. If you only use the system every few days, you can get away with 2 days of storage. This reduces the cost but shortens the life of some batteries. The features and functions of you the need to know in purchasing a shipping-container lighting kit charge controller. An MPPT controller saves up to 30 % more energy than a PMW controller and stores the history of solar and usage production for up to 30 days, making it easier to understand the system if there is a future issue. The brightness and color temperature of the LED lights.High CRI over 90 and 4000K are best for light quality and lumen output. The length and quality of the wiring One size does not fit all. Custom is best, or the standard layout is all prewired. The longer the run or higher the amps, the larger the wire size needs to be The ease and security of the mounting hardware when purchasing a shipping-container lighting kit. 2 – 100 pounds of the magnetic force on each 10-pound fixture gives you more than enough strength for a ballasted system but pole-mounted solar panels need to be mounted higher than the shipping container) The battery box can be mounted in a shipping container, but putting two 2X4s from floor to ceiling and mounting the box to them The warranty and customer service of the kit provider. 5 years on Parts and Labor if the system is one year you get what you pay for because if they will not stand behind it for more than a year you have to ask why? Can you add AC to the kit to charge batteries or Cell phones and other electronic devices when you purchase a shipping-container lighting kit? Yes, but that is not just a lighting kit; it is a lighting and power kit sized based on estimated usage. Shading on the solar panel. If you have any shading of the solar panel, you need to add more solar panels to help cover this limitation of production. The Best solar window is from 9 am to 4 PM. To the south in the northern hemisphere and north in the southern hemisphere.

Gazebo Lighting Kits
Solar Powered

Are you looking for a way to illuminate your gazebo with solar power?

We have many options. Solar gazebo lights are a great solution for eco-friendly, energy-efficient, and cost-effective outdoor lighting. Here is some information about gazebo solar lighting and Solar Power that you might find useful. Solar gazebo lights are LED lights powered by a solar panel. They include a battery, solar panel, and lighting controls attached to them or placed nearby. The solar panel collects sunlight during the day and converts it into electricity stored in a battery. At night, the battery provides power to the lights. A switch, a remote control, or a timer can turn the lights on and off powered by Solar Power. Different types of solar gazebo lights are available, depending on your needs and preferences. Some of them are: Solar string lights are made of strings of LED bulbs that can be hung around the gazebo or draped over its roof. Their warm and colorful glow creates a festive and romantic atmosphere. Some solar string lights have different lighting modes, such as steady, flashing, or fading. Solar vapor-tight lights hanging lights that can be suspended from the gazebo ceiling or hooks. They provide more focused and bright illumination for reading, dining, or playing games. Some of these lights use Solar Power and can have motion sensors that activate them when someone approaches. Solar chandelier lights: These elegant and decorative lights resemble chandeliers. Their intricate designs and shapes can add a touch of sophistication and style to your gazebo. Solar chandelier lights have multiple light sources that can be adjusted individually. Light bulbs should be 12 or 24 volts, but if you want AC bulbs, an inverter is required, which costs extra and requires a larger system. Solar flood lights: These powerful, wide-angle lights can illuminate a large area around your gazebo. They are ideal for security and safety purposes, as they can deter intruders and animals. If you order the dimming function, some solar flood lights have adjustable brightness and sensitivity settings. Solar Power ensures that you won’t have to worry about running out of energy. When choosing solar gazebo lights, you should consider some factors, such as: The size and shape of your gazebo: Measure it and choose solar lights that fit its dimensions and style. Consider how much light you need and where you want to place the lights. Solar lights offer fantastic quality and durability, ensuring a remarkable return on your investment! Our lighting kits are crafted from robust, weather-resistant materials like fiberglass, metal, or glass. When choosing the perfect solar lights, keep battery capacity and lifespan in mind to match your usage and daily runtime. Trust me, these lights will brighten your space and delight you for years to come! your usage and the daily runtime of the lights. You need to be aware of the battery warranty and customer service using Solar Power. The installation and maintenance of solar lights: You should choose solar lights that are easy to install and operate without requiring wiring or tools. All of our lighting kits are close to plug-and-play with some small assemblies. You should also follow the instructions and tips provided by our manual on how to care for and clean the solar lights and panels. Solar gazebo lighting is a smart and convenient way to enhance your outdoor living space with renewable energy. Choosing the right solar lights for your gazebo allows you to enjoy a cozy and inviting ambiance at night without worrying about electricity bills or environmental impact.

Off Grid Solar Panel - Sun In One
Solar Panel

How to know of you have enough solar panel to completely off grid?

Are you considering making the leap to a completely off-grid solar power system? It’s an exciting step toward energy independence and sustainability. However, to ensure your transition is successful, it’s crucial to determine whether you have the right number of solar panels to meet your energy needs. Let’s dive into the key factors you need to consider. The foundation of determining your solar needs begins with understanding your energy consumption. Review your past electricity bills to find your average monthly or annual usage, measured in kilowatt-hours (kWh). Include all the energy-consuming devices and appliances in your household to get an accurate picture of your needs. Analyze Your Energy Bills: Start by reviewing your past electricity bills. Most utility companies provide a detailed breakdown of your energy consumption, typically measured in kilowatt-hours (kWh). Look at both peak and off-peak usage, as this will give you a more accurate picture of your energy demands. List Your Appliances and Devices: Make a comprehensive list of all the appliances and devices you use daily, including their wattage. This should include everything from refrigerators, heating and cooling systems, lights, and kitchen appliances to smaller devices like laptops, phones, and televisions. Estimate Daily Usage: To get an estimate of your daily energy usage, multiply the wattage of each device by the number of hours you use it per day. Factor in Seasonal Variations: Remember that energy consumption can vary seasonally. For example, heating systems may consume more energy in the winter, while air conditioning units may drive up consumption in the summer. Understand Solar Panel Output Each solar panel has a specific output rating, typically measured in watts (W). To estimate how much energy your panels will produce, you need to know the average sunlight hours in your area. This information helps you determine the daily energy production of each panel. Sunlight Hours: The amount of sunlight your location receives is critical in determining how much energy your solar panels can produce. This is measured in “peak sun hours,” which represents the equivalent number of hours per day when solar radiance averages 1,000 watts per square meter. System Design and Installation: The orientation and tilt of your solar panels can also impact their efficiency. Panels should be oriented to maximize exposure to sunlight throughout the day. Additionally, avoiding shading from trees, buildings, or other obstacles is crucial to maintaining optimal performance. Account for System Efficiency Solar panel systems are not 100% efficient due to factors such as shading, dirt, and inverter losses. A practical approach is to consider an overall efficiency factor of around 75-80% when calculating usable energy. Even with a well-sized solar panel system, it’s essential to plan for energy efficiency and redundancy to ensure your off-grid system operates smoothly. Energy Efficiency: Reducing your energy consumption through energy-efficient appliances, LED lighting, and smart energy management can help lower the number of panels and battery capacity needed. Redundancy: Consider adding a backup generator or additional battery storage as a safety net. This can provide extra power during extended periods of low sunlight or in case of system failures. Maintenance: Regular maintenance of your solar panels, batteries, and other system components is crucial to ensure they operate efficiently. This includes cleaning the panels, checking battery health, and inspecting wiring and connections. Determine Battery Storage Needs Since an off-grid system requires reliable battery storage, calculate the battery capacity needed to cover periods without sunlight, such as cloudy days or nighttime. This will ensure you have a consistent power supply when solar energy isn’t available. Battery Capacity: The capacity of your battery storage system is measured in kilowatt-hours (kWh). It should be sufficient to store enough energy to cover your usage during periods when solar production is not possible. Battery Type: There are different types of batteries available for solar systems, including lead-acid and lithium-ion batteries. Lithium-ion batteries are more efficient, have a longer lifespan, and require less maintenance, making them a popular choice for off-grid systems. Charge Controllers and Inverters: These components manage the flow of electricity from the solar panels to the batteries and from the batteries to your home. Calculating Daily Energy Production: To estimate the daily energy output of your solar panels, Determining the Number of Panels Needed Now that you have an estimate of both your energy consumption and the output of your solar panels, you can calculate the number of panels required to meet your energy needs. Consult with Solar Experts While these calculations provide a useful estimate, consulting with a solar energy expert is always a good idea. Our team can help you design a customised solar system that fits your specific needs and ensures optimal performance. Determining if you have enough solar panels to go completely off-grid involves evaluating your energy consumption, understanding solar panel output, considering system efficiency, and planning for battery storage. By following these steps and consulting with experts, you can confidently move toward a sustainable and self-sufficient energy future. For more information reach out to SunInOne and let us help you achieve your off-grid solar goals.

Solar Panel - SunInone
Solar Panel

How Much Solar Do I Need to Take My Home or Business to Zero?

As the world increasingly shifts towards renewable energy, many homeowners and businesses are exploring how to reduce or even eliminate their dependence on traditional energy sources. One of the most effective ways to achieve this is by installing solar panels to power your property. But the question remains: How much solar do you need to take your home or business to zero? In other words, how can you generate as much energy as you consume, leading to a net-zero energy balance? Understanding Net-Zero Energy Before diving into calculations, it’s important to understand what net-zero energy means. A net-zero energy home or business is one that produces as much energy as it consumes over the course of a year. This doesn’t necessarily mean you’ll be off the grid, but rather that the energy you generate through solar panels will offset the energy you consume from the grid, resulting in a zero or near-zero energy bill. Assess Your Energy Consumption The first step in determining how much solar you need is to assess your current energy consumption. This is typically measured in kilowatt-hours (kWh). Your electricity bill will provide you with this information. For Homeowners Review your monthly electricity bills and calculate the total kWh used over the past year. Divide this number by 12 to determine your average monthly consumption. For a more detailed analysis, break it down by day or week if possible. Determine the Solar Panel Output Once you have a clear picture of your energy consumption, the next step is to determine how much energy your solar panels can produce. This depends on several factors: Solar Panel Efficiency: Solar panels are available in a range of efficiencies, typically between 15% and 22%. Higher efficiency panels will produce more electricity from the same amount of sunlight. Sunlight Hours: The amount of sunlight your location receives is crucial. Solar panels produce electricity when exposed to sunlight, and different regions receive varying amounts of sunlight throughout the year. Calculate the Number of Solar Panels Needed With your energy consumption and potential solar output in mind, you can now calculate the number of solar panels required to reach net-zero energy. Daily Energy Needs: Divide your average daily energy consumption by the daily output of one solar panel. Example Calculation: If your home uses 1,200 kWh per month, that’s approximately 40 kWh per day. If each 300-watt solar panel generates 1.5 kWh per day, you would need around 27 panels to meet your daily energy needs (40 kWh / 1.5 kWh = 26.67 panels). However, this is a simplified calculation. You should also consider system losses, efficiency reductions, and other factors which may increase the number of panels required. Account for System Losses and Efficiency No solar system is 100% efficient. There are always losses due to factors such as shading, dust, inverter inefficiencies, and temperature fluctuations. Typically, these losses can range from 10% to 25%. System Losses: To account for these losses, increase the number of panels by 10-25% depending on your system’s specific conditions. Consider Future Growth and Energy Needs If you plan to purchase an electric vehicle, add an extension to your home, or increase your use of energy-intensive appliances, your energy consumption will rise.Expanding operations, adding more equipment, or extending operating hours will increase energy demand. Evaluate Roof or Ground Space The amount of space available on your roof or property is another crucial factor. Solar panels require a significant amount of space, and not all roofs are suitable for installation. Roof Space: Ensure you have enough unobstructed space to install the number of panels you need. Ground-Mounted Systems: If roof space is limited, consider a ground-mounted system, which offers more flexibility in terms of placement and orientation. Consider Battery Storage If you want to maximise your energy independence, consider adding battery storage to your solar system. Batteries store excess energy generated during the day for use at night or during cloudy periods, reducing your reliance on the grid. Battery Sizing:– The size of the battery system depends on your energy consumption patterns and how much autonomy you want. Backup Power:- Batteries can also provide backup power during outages, offering additional security and peace of mind. Consult with a Solar Professional Finally, while these calculations provide a good starting point, it’s essential to consult with a solar professional who can assess your specific needs and location. They can provide a detailed proposal, including a site assessment, system design, and an estimate of costs and savings. They can also help you navigate incentives, rebates, and financing options. Taking your home or business to zero energy with solar power is an achievable goal with careful planning and consideration. By understanding your energy consumption, calculating the right amount of solar capacity, and accounting for potential losses and future growth, you can design a system that meets your needs and helps you achieve energy independence.

Off-grid solar panels
Solar Panel

Where do you place the solar panels to get the most power out of them?

Solar panels are an excellent way to harness renewable energy, but their efficiency depends largely on where they are placed. At Sun In One, we understand the importance of optimising solar panel placement to maximise energy generation. Whether you’re powering a commercial property, industrial site, or residential space, the right placement can make all the difference. Choosing the Right Direction for Maximum Sun Exposure Solar cells panel is use solar energy with Speed dome CCTV camera system new technology 4.0 signal for looked around security area for safe. The sun spends most of its time in the southern part of the sky. Therefore, solar panels should face true south (not magnetic south) to capture the most sunlight throughout the day. This orientation ensures that your panels receive direct sunlight from sunrise to sunset, which is key to maximising their power output. Optimising for Specific Times of Day If your energy needs peak during certain times, you can slightly adjust the direction of your panels. For example, tilting your panels a little to the west can increase energy production in the late afternoon. Alternatively, tilting them toward the east could boost morning energy production. Setting the Correct Tilt Angle for Solar Panels The angle at which solar panels are tilted plays a critical role in their ability to capture sunlight. As a general rule, the tilt angle should match your location’s latitude. This allows the panels to capture sunlight perpendicularly, which increases energy absorption and improves efficiency. Seasonal Adjustments In regions with distinct seasons, the sun’s position in the sky changes throughout the year. During the winter, when the sun is lower in the sky, solar panels can benefit from a steeper angle. Conversely, during summer, a shallower angle helps capture the higher-positioned sun. While seasonal tilt adjustments can significantly boost energy production, most residential solar installations use fixed panels. If you’re interested in getting the most out of your system year-round, Sun In One offers adjustable mounting systems for commercial and industrial applications, allowing you to modify the tilt angle for optimal seasonal performance. Avoiding Shading for Maximum Efficiency The Impact of Shade on Solar Panels One of the most significant factors that affect solar panel efficiency is shading. Even partial shading can drastically reduce power output, as it limits the amount of sunlight the panels can absorb. How to Minimise Shading To get the most out of your solar panels, they should be installed in a location with minimal shading throughout the day. Common causes of shading include trees, chimneys, and nearby buildings. It’s crucial to ensure that your solar panels receive direct sunlight during peak hours, typically between 9 a.m. and 3 p.m. Roof-Mounted vs. Ground-Mounted Panels Roof-Mounted Solar Panels Roof-mounted solar panels are a popular option for residential and commercial installations. They make use of existing space and are less likely to experience shading if installed on a properly oriented roof. The pitch of your roof plays an important role in determining the optimal tilt for your panels. Ideally, your roof should have a pitch between 15 and 40 degrees to allow panels to capture maximum sunlight. Ground-Mounted Solar Panels For properties with insufficient roof space or those that experience significant shading, ground-mounted solar panels are an excellent alternative. These systems provide more flexibility in positioning, allowing you to choose the optimal direction and tilt for your panels. Ground-mounted systems also offer easier access for maintenance and can be adjusted seasonally for better performance. At Sun In One, we design custom ground-mounted solar solutions to suit the specific needs of our clients, whether for large commercial solar farms or residential installations. Solar Tracking Technology For those looking to maximise energy production, solar tracking systems offer an advanced solution. These systems follow the sun’s path across the sky, ensuring that your solar panels are always at the optimal angle. Single-axis trackers adjust from east to west, while dual-axis trackers also adjust vertically to account for the changing position of the sun throughout the year. While solar tracking systems are more expensive, they can increase energy output by up to 35%. At Sun In One, we offer customised solar tracking solutions for large-scale installations, such as commercial properties and solar farms. Accounting for Local Weather Patterns Weather patterns such as cloudy days, rainfall, or snowfall can impact the efficiency of solar panels. To combat this, positioning your panels in the area with the best access to direct sunlight is crucial. In regions with heavy rain or snow, installing solar panels at a steeper angle helps ensure debris and snow slide off, keeping your panels clear. Maximising the power output from your solar panels depends on strategic placement and taking into account factors such as direction, tilt, shading, and local climate. At Sun In One, we specialise in designing solar systems tailored to your unique environment and energy needs.

Where to Buy Solar Lights
Solar Panel

How Does the Angle of Your Solar Panel Increase Your Power Generated?

One of the most important factors that determine how much energy your solar panels produce is the angle at which they are installed. The angle of your solar panels can significantly affect their efficiency and power output, as it determines how much sunlight they receive throughout the day. When placed at the optimal angle, solar panels can capture the maximum amount of sunlight, increasing energy production and efficiency. The Science Behind Solar Panel Angles Solar panels work by converting sunlight into electricity using photovoltaic cells. The more sunlight that hits the surface of these cells, the more energy they generate. The angle at which your solar panels are installed directly impacts how much sunlight they are exposed to throughout the day. How Angle Affects Solar Power Output Maximising Sun Exposure The angle of your solar panels determines how long they are exposed to direct sunlight. The closer the angle is to the optimal position, the more time the panels spend receiving sunlight at a perpendicular angle, which is when they generate the most power. Minimising Energy Loss When solar panels are placed at an incorrect angle, energy loss occurs. This happens because the sunlight is hitting the panel at a less direct angle, reducing the intensity of the sunlight hitting the photovoltaic cells. As a result, the panels generate less electricity. Factors to Consider for Optimal Solar Panel Angle Latitude and Location The most important factor in determining the optimal angle for solar panels is your geographic location, particularly your latitude. For example, if you’re located near the equator, solar panels should be installed at a flatter angle. In contrast, for higher latitudes, the panels should be installed at a steeper angle to capture more sunlight. Sun In One designs its solar solutions with your specific location in mind, ensuring that the solar panels are installed at the most efficient angle for your geographic area. Roof Slope and Orientation The slope of your roof or the surface where the solar panels are installed also plays a key role in determining the angle. In some cases, the roof’s slope may already be close to the ideal angle. In other cases, adjustments might be needed using specialised mounting systems. With Sun In One’s customisation solar solutions, roof-mounted panels can be adjusted to ensure they are at the right angle for optimal sunlight capture. Shading and Obstacles It’s essential to place solar panels in an area where they receive full sunlight, without any obstruction from trees, buildings, or other structures. Shading can significantly reduce the efficiency of your solar panels, regardless of the angle. Sun In One provides expert consultation and design services to evaluate your property and identify the best location for your solar panels. Their team ensures that shading is minimised and the panels are installed in a spot that receives full exposure to sunlight. Solar Tracking Systems for Peak Efficiency For those looking to achieve the highest possible energy output, Sun In One offers solar tracking systems that automatically adjust the angle of the panels throughout the day to follow the sun’s path. These systems can increase energy production by up to 35% compared to fixed-angle systems. While more expensive than fixed systems, they are ideal for large commercial projects or homes where maximum energy production is essential. Sun In One’s solar tracking systems are built with durability and reliability in mind, ensuring that you get the best performance without the need for constant maintenance. The angle of your solar panels plays a crucial role in how much power they generate. With Sun In One’s advanced solar solutions, you can ensure that your solar panels are installed at the optimal angle for your location and needs.

Solar Panel System - SunInOne
Solar Panel

Why One Size Does Not Fit All When It Comes to Solar Power

In the ever-evolving world of renewable energy, solar power stands out as a beacon of sustainability and innovation. However, one common misconception is that solar power solutions can be universally applied without considering individual needs and circumstances. The reality is that solar power systems are highly customisation and must be tailored to fit specific requirements. At SunInOne, we understand that one size does not fit all when it comes to solar energy solutions. Varied Energy Needs Every household, business, and facility has unique energy consumption patterns. For instance, a small residential home will have different energy needs compared to a large commercial building or a sprawling industrial site. Solar power systems need to be designed to meet these specific energy requirements. This involves calculating the total energy consumption, peak load times, and the efficiency of existing electrical systems. Customizing solar solutions ensures that you generate enough power to meet your needs without overinvesting in unnecessary capacity.  Diverse Geographic and Climatic Conditions The amount of solar energy a system can harness is significantly influenced by its geographic location and local climate. Areas with more sunshine, such as those with clear skies and minimal pollution, will generate more solar power compared to regions with frequent cloud cover or heavy rainfall. Additionally, the angle of solar panels and their orientation relative to the sun’s path vary depending on latitude. Custom solar designs account for these geographic and climatic factors to maximize energy production and system efficiency. Different Roof Types and Mounting Options Solar panel installation is heavily dependent on the type of roof and available space. Roofs come in various shapes, materials, and orientations, which can impact the installation process and the effectiveness of solar panels. For instance, flat roofs might require different mounting systems compared to pitched roofs. Some buildings might have limited space for solar panels, necessitating creative solutions like ground-mounted systems or solar canopies. Each situation requires a tailored approach to ensure optimal panel placement and system performance.  Individual Aesthetic and Design Preferences Solar power systems should not only be functional but also align with the aesthetic preferences of the property owner. Many homeowners and businesses want solar solutions that blend seamlessly with their existing architecture and design. Custom solar installations can incorporate various design elements, such as low-profile panels, innovative mounting solutions, and aesthetically pleasing enclosures, to maintain the visual appeal of the property while maximizing energy efficiency.  Budgetary Constraints and Financial Goals Financial considerations play a crucial role in solar power system design. Different budgets will dictate the scale and type of solar solutions that can be implemented. Custom solutions allow for flexible financing options, such as leasing, power purchase agreements (PPAs), or cash purchases. Additionally, tailored designs can optimize the return on investment by balancing upfront costs with long-term energy savings and potential incentives.  Integration with Existing Infrastructure Solar power systems often need to be integrated with existing electrical infrastructure, including wiring, inverters, and energy storage solutions. Custom installations take into account the specifics of the existing infrastructure to ensure compatibility and efficiency. This integration is crucial for seamless operation and to avoid potential issues that could arise from mismatched components or outdated systems.  Regulatory and Permitting Requirements Different regions have varying regulations and permitting requirements for solar installations. These can include zoning laws, building codes, and utility interconnection standards. A one-size-fits-all approach would not account for these local regulations, potentially leading to compliance issues or delays. Custom solar solutions ensure that all local requirements are met and that the installation process proceeds smoothly.  Future Expansion and Scalability As energy needs and technologies evolve, the ability to expand or upgrade a solar power system is important. Custom solutions can be designed with future scalability in mind, allowing for easy upgrades or additions. Whether you plan to increase energy consumption or incorporate new technologies, a tailored system can accommodate these changes without requiring a complete overhaul.  Personalized Support and Maintenance Ongoing support and maintenance are crucial for the longevity and efficiency of a solar power system. Custom installations often come with personalized support options, ensuring that any issues or concerns are addressed promptly. Regular maintenance tailored to the specific design and components of the system helps in maintaining optimal performance and extending the lifespan of the solar power solution. At SunInOne, we recognise that solar power is not a one-size-fits-all solution. Each project requires a thoughtful, customised approach to ensure that the solar power system meets the unique needs of the user, adapts to local conditions, and integrates seamlessly with existing infrastructure. By understanding the diverse factors that influence solar power systems, we can provide solutions that deliver maximum efficiency, cost-effectiveness, and satisfaction. If you’re considering solar power for your home or business, contact us to discuss how we can create a tailored solar solution that fits your specific needs and goals.

Solar Panel Kit
Solar Panel

What are the Ways Manufacturers Cut Corners to Make Solar Less Expensive and Shorten Its Longevity?

As the global demand for renewable energy solutions continues to rise, solar energy remains a key player. Solar-powered systems, including solar panels and solar lighting, are becoming more common in both residential and commercial settings. However, like any booming industry, the solar sector has its share of manufacturers cutting corners to reduce costs. While these practices may make solar energy systems more affordable upfront, they often come at the expense of longevity, reliability, and overall performance. By understanding these practices, you can make more informed choices about solar systems, including those offered by Sun In One, which prides itself on quality and durability over cost-cutting tactics. Lower-Quality Solar Cells One of the most critical components of any solar system is the solar cell itself. Solar cells are the heart of solar panels, converting sunlight into electricity. To cut costs, manufacturers may opt to use lower-quality or second-tier solar cells. These cells often have defects or inefficiencies that significantly reduce their energy output. Signs of Lower-Quality Solar Cells – Reduced efficiency: High-quality solar cells convert a greater percentage of sunlight into usable energy. Lower-quality cells might only convert a fraction of the available sunlight, meaning your system produces less power overall. – Shortened lifespan: Premium solar cells can last 25 years or more, but lower-quality cells may degrade much faster, sometimes within 5-10 years. – Inconsistent output: Cheaper cells can lead to power inconsistencies, affecting the overall stability of your solar system. High-quality providers like Sun In One ensure that their solar products use premium solar cells with minimal defects, maximizing the system’s longevity and energy output. Inferior Panel Encapsulation Solar panels are composed of delicate components that need to be protected from environmental elements. Encapsulation is the process by which these components are sealed within a protective layer. High-quality encapsulation materials, such as ethylene vinyl acetate (EVA), ensure that solar panels are durable and resistant to weather conditions. Manufacturers looking to cut corners may use cheaper encapsulation materials that are less effective at protecting solar cells from moisture, dirt, and UV degradation. Poor encapsulation can lead to panel delamination, where the protective layer separates from the solar cells, causing rapid degradation. Effects of Inferior Encapsulation: – Water ingress: Moisture can seep into the panel, causing short circuits or cell corrosion. – UV damage: Poor UV protection can accelerate the degradation of solar cells and decrease their lifespan. – Physical deterioration: Substandard encapsulation materials can crack, peel, or warp, further reducing the panel’s durability. Cheaper Frame Materials Solar panel frames are another area where manufacturers may cut costs. Aluminum is commonly used for solar panel frames because it is lightweight, strong, and resistant to corrosion. However, to lower costs, some manufacturers opt for thinner aluminum or substitute it with lower-grade materials like plastic or low-grade metals. Consequences of Cheaper Frames: – Reduced durability: Thin or inferior frames are more susceptible to bending, warping, or breaking under extreme weather conditions like heavy wind or snow. – Corrosion: Low-quality metals may not have the same resistance to rust and corrosion as high-grade aluminum, which can lead to frame degradation over time. – Installation challenges: Cheaper frames may be more difficult to install securely, which can affect the overall safety and stability of the solar system. Using premium materials for solar panel frames is essential for ensuring that your solar system remains stable and durable, even in harsh environments. This is especially important for commercial applications where solar systems are exposed to the elements daily. Substandard Glass Coverings The glass that covers solar panels plays a crucial role in protecting the solar cells while allowing sunlight to pass through. Tempered glass is the industry standard for high-quality solar panels because it is strong, durable, and resistant to breakage. However, to reduce costs, some manufacturers use thinner, non-tempered glass, which is far more prone to breaking or cracking. Downsides of Cheap Glass: – Susceptibility to damage: Thinner or non-tempered glass is much more likely to shatter or crack during hail storms or extreme temperature fluctuations. – Reduced light transmission: Some low-cost glass options may have higher levels of impurities, reducing the amount of sunlight that reaches the solar cells. – Increased maintenance: Glass that cracks or deteriorates over time will need to be replaced more frequently, adding to the long-term cost of owning a solar system. Choosing solar panels with high-quality tempered glass, like those offered by Sun In One, ensures better durability and performance in the long term. Compromised Wiring and Connectors Wiring and connectors are often overlooked components in solar systems but are essential for safely transmitting the electricity generated by the solar cells. Manufacturers may choose to cut costs by using low-grade wiring or connectors that are prone to corrosion, poor electrical conductivity, or mechanical failure. Risks of Cheap Wiring: – Energy loss: Substandard wiring can lead to significant energy losses as electricity passes through the system, reducing overall efficiency. – Fire hazards: Poor-quality wiring is more likely to overheat or short circuit, which can pose serious fire risks. – System breakdowns: Faulty connectors can lead to intermittent power issues or complete system failures, requiring costly repairs. Investing in systems with high-quality wiring and connectors ensures not only the efficiency of your solar system but also the safety of your property. Unreliable Inverters Inverters are a crucial part of solar energy systems, converting the direct current (DC) generated by the solar panels into alternating current (AC), which is used by most household and business appliances. Some manufacturers lower costs by using cheaper inverters that are less efficient and have a shorter lifespan. Effects of Using Cheap Inverters: – Reduced energy conversion: Lower-quality inverters may not convert all of the available DC energy into usable AC energy, reducing the system’s overall efficiency. – Frequent breakdowns: Cheap inverters tend to have higher failure rates, leading to more frequent maintenance or replacement needs. – Lower power output: Inverters with low efficiency ratings reduce the amount of power that can be delivered to your electrical

Sun-In-One off grid Solar Panel
Solar Panel

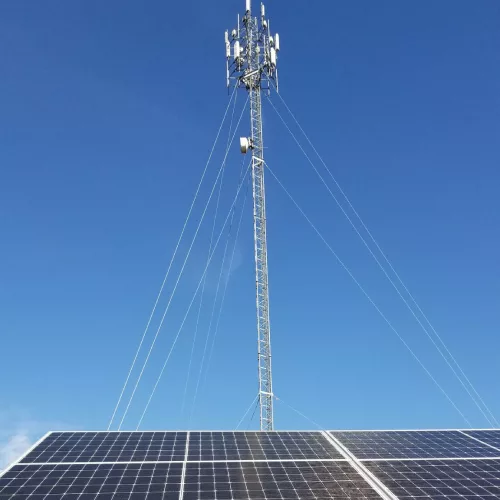
Can You Run a Cell Tower 100% Off-Grid? What You Need to Determine for Your System

In the digital age, where seamless communication is paramount, cell towers form the backbone of mobile networks. But as the demand for network coverage expands into rural and remote areas, one significant challenge arises: powering these cell towers in regions far from the grid. Could solar power provide a reliable solution? Is it feasible to run a cell tower entirely off-grid using renewable energy sources? The answer is a resounding “yes,” but it requires careful planning and an understanding of the specific needs of your system. This article will explore how you can run a cell tower 100% off-grid and the factors you need to determine to achieve that goal. Understanding the Basics – What Powers a Cell Tower? Before diving into off-grid solutions, it’s essential to understand how much power a typical cell tower consumes and why it’s critical. Cell towers host the equipment necessary for wireless communication, such as antennas, transmitters, receivers, and processors, all of which require continuous power to operate effectively. A typical cell tower consumes anywhere from 1kW to 8kW depending on several factors like location, the number of users it serves, the technology it supports (3G, 4G, or 5G), and additional features such as lighting and cooling systems. Given that cell towers often run 24/7, the power requirements add up quickly, especially in off-grid scenarios where reliability is crucial. To power a cell tower completely off-grid, you’ll need a solution that provides consistent energy throughout the day and night, independent of the weather or time of year. Estimating Power Requirements for Your Cell Tower The first step in running a cell tower off-grid is accurately estimating its power consumption. This estimate is crucial because it dictates the size and capacity of the solar panels, batteries, and other equipment you’ll need. Equipment Load Calculation: Identify all the components that require power and their wattage. This includes radio equipment, control units, cooling systems, and auxiliary systems like security cameras and lights. Average Power Use Per Day: Multiply the total wattage by the number of hours the equipment operates daily to get an accurate picture of the energy needs. For example, if your tower consumes 5kW per hour, and it operates 24 hours a day, you’ll need 120kWh daily. Allow for Peak Loads: Cell towers experience periods of peak traffic, particularly during events or emergencies. Make sure to factor in the additional energy requirements during these times. Selecting the Right Renewable Energy System Once you’ve determined the total energy consumption, it’s time to evaluate different renewable energy systems. For off-grid applications, the most viable option for powering a cell tower is a solar power system, though wind or hybrid systems can also be considered depending on local conditions. Solar Power Systems Solar energy is the most common solution for powering off-grid infrastructure due to its accessibility and reliability. Here’s how to ensure you get the right setup: Solar Panel Array Sizing: The size of your solar panel array depends on the daily power consumption of your cell tower and the amount of sunlight (solar irradiance) your site receives. You can calculate the necessary solar array size using this simple formula: For example, if your tower needs 120kWh per day and your location receives 5 hours of peak sunlight per day, you would need a solar array that can generate 24,000W (24kW) of power during peak sunlight hours. Panel Efficiency: Not all solar panels are equal, so it’s essential to consider their efficiency. High-efficiency panels may cost more upfront, but they produce more energy per square foot, allowing you to install fewer panels. Location and Tilt: The placement and angle of your solar panels are critical. Solar panels should be installed facing the equator (south in the northern hemisphere and north in the southern hemisphere) at an angle equal to your location’s latitude to maximize energy production. Seasonal Variations: In off-grid systems, you must also consider seasonal variations in sunlight. Ensure your system can still meet energy demands during the winter or cloudy months when solar output may decrease. Wind Power as a Supplement If your location experiences strong, consistent winds, wind turbines can complement your solar power system and provide energy when sunlight is scarce. A hybrid wind-solar system can be particularly effective in areas with varied weather conditions. Assess Wind Resource: Measure the average wind speeds in your location. Wind turbines are more effective in areas with wind speeds above 10 mph. Hybrid Solutions: By combining solar and wind energy, you can ensure more consistent power generation, reducing reliance on large battery banks. Battery Storage and Backup Systems Since cell towers must operate 24/7, having a reliable battery storage system is crucial for storing excess energy produced during the day to power the tower at night or during cloudy periods. Battery Capacity Sizing Battery Banks: Your battery bank needs to store enough energy to power the cell tower during non-sunlight hours and provide backup during cloudy weather. To calculate the required battery capacity, you can use the following formula:   For example, if your cell tower consumes 120kWh daily and you want 3 days of autonomy, you would need a battery bank with 360kWh capacity. Battery Types: The most common types of batteries for off-grid systems are lithium-ion and lead-acid. Lithium-ion batteries are more expensive but offer longer lifespans, higher efficiency, and greater depth of discharge compared to lead-acid batteries. Backup Generators: Even in a 100% off-grid system, it’s wise to have a backup generator for emergencies, especially in regions with extreme weather conditions. Diesel or propane generators can provide temporary power until the renewable system is back online. Energy Management System (EMS) To ensure efficient use of energy in your off-grid system, an Energy Management System (EMS) is necessary. The EMS monitors energy production and consumption in real-time, optimizing energy use and prolonging battery life. Load Prioritization: An EMS can prioritize critical components, ensuring that essential equipment like antennas and transmitters continue to operate even when power is limited. Remote Monitoring: Since off-grid cell towers

Off-grid solar systems
Solar Energy

Why is Your Charge Controller So Important in Off-Grid Systems?

Off-grid solar systems offer the freedom of energy independence, but they require careful management to function efficiently. One of the most vital components in any off-grid system is the charge controller. This device regulates the energy flow from your solar panels to your battery bank, ensuring safe and efficient energy storage and usage. Here’s why your charge controller is so crucial in an off-grid system, Protecting Your Batteries Batteries are the heart of an off-grid system, storing solar energy for use when the sun isn’t shining. The charge controller ensures that your batteries aren’t overcharged, which can lead to overheating, reduced lifespan, or even permanent damage. It also prevents the battery from being drained too low, which can significantly reduce its ability to hold a charge. – Overcharging Prevention: By regulating voltage and current, the charge controller protects batteries from overcharging. – Battery Longevity: A charge controller maximizes battery life by ensuring proper charging cycles. Regulating Energy Flow Solar panels generate electricity based on sunlight, but this energy needs to be controlled to be usable and safe for your off-grid system. A charge controller regulates how much energy is sent from the solar panels to the batteries, making sure that the batteries receive the right amount of power without being overloaded. – Voltage Regulation: Ensures the correct voltage is supplied to prevent damaging sensitive equipment. – Energy Efficiency: Helps distribute energy more efficiently throughout the system. Managing Power Output in Real-Time Charge controllers play an essential role in monitoring the flow of electricity between solar panels and the battery bank in real-time. This real-time management allows for the system to adjust based on how much energy is being produced versus how much is needed. – Dynamic Adjustment: Adapts the system to changes in sunlight or energy demands. – Improved Efficiency: Helps reduce energy wastage by efficiently storing excess power. Preventing System Failures Without a proper charge controller, your off-grid solar system could be prone to breakdowns and failures. Overcharging or discharging your batteries too deeply can lead to power shortages, equipment failure, or even dangerous overheating. The charge controller helps mitigate these risks by providing stable and controlled energy flow. – System Protection: Reduces the risk of electrical failure. – Safety Mechanisms: Some charge controllers come with built-in alarms or shutoff features to prevent damage. MPPT vs. PWM Charge Controllers There are two main types of charge controllers: Pulse Width Modulation (PWM) and Maximum Power Point Tracking (MPPT). Choosing the right one for your off-grid system depends on your energy needs. – PWM Charge Controllers: A more basic, affordable option ideal for smaller solar setups. – MPPT Charge Controllers: More advanced, these controllers optimise the power output by adjusting voltage and current to maximize energy production. They are perfect for larger, more complex off-grid systems. At Sun In One, both types of controllers are available, helping you choose the best one based on your system size and energy requirements. Smart Technology Integration Modern charge controllers are equipped with smart technology, allowing users to monitor their system performance remotely. This feature ensures you can keep track of your system’s health and make adjustments as needed. – Remote Monitoring: Easily monitor your solar system from a mobile app or online platform. – System Insights: Provides valuable data to optimize energy production and consumption. Energy Independence and Reliability By ensuring your solar system is always working efficiently, a high-quality charge controller increases the reliability of your off-grid power supply. Whether you’re powering a home, a remote cabin, or industrial equipment, the charge controller guarantees a steady, reliable flow of electricity. – Consistent Power Supply: Maintains power even when solar energy production fluctuates. – Off-Grid Sustainability: Supports long-term sustainability by enhancing system performance. The Key to Off-Grid Success In an off-grid system, the charge controller is not just a small part of the puzzle—it’s the key to ensuring system longevity, energy efficiency, and overall performance. With Sun In One’s range of solar solutions, you can find the ideal charge controller to protect your batteries, optimize energy production, and keep your off-grid system running smoothly.

Off Grid Solar Lighting System
Solar Energy

How Much Battery Do You Need for an Off-Grid System?

Going off-grid is a dream for many, but one of the biggest challenges is ensuring a reliable power supply when the sun isn’t shining or the wind isn’t blowing. Batteries play a critical role in off-grid energy systems by storing electricity for use during periods of low or no generation. However, determining how much battery storage you need for your off-grid system is crucial for efficiency and sustainability. This blog will take you through the key factors that determine battery requirements, battery types, and how to optimize your system for long-term performance. Understanding Your Energy Needs The first step in determining how much battery storage you’ll need is understanding your energy consumption. This involves calculating the total daily watt-hours (Wh) that your household or business uses. Here’s how to go about it:  Calculate Your Total Energy Usage To calculate your energy needs, list all of your appliances, tools, and electronics, along with their wattages. You’ll also need to know how many hours per day each device runs. For example: – Lighting: 10 LED bulbs at 10 watts each for 5 hours a day = 500 Wh – Refrigerator: 150 watts for 24 hours a day = 3,600 Wh – Laptop: 50 watts for 8 hours a day = 400 Wh Once you’ve done this for all of your devices, you can sum up the total daily watt-hour consumption.  Account for Energy Surplus It’s always a good idea to add a surplus of 10-30% to your daily consumption to account for energy inefficiencies or unexpected increases in demand. This helps avoid battery depletion and keeps your system running smoothly during peak usage times. Battery Capacity and Storage Requirements Battery capacity is measured in watt-hours (Wh) or kilowatt-hours (kWh), which indicate how much energy the battery can store. To calculate the total storage capacity you’ll need, you’ll need to decide how many days of autonomy you want—this means how many days your system can run without any input from solar panels or other energy sources.  Determine Autonomy Days Autonomy days refer to the number of days your off-grid system should be able to function without any energy generation. For example, if you want to be prepared for 3 days of cloudy weather, you’ll need enough battery storage to last that long without any solar input. If your daily consumption is 10 kWh, and you want 3 days of autonomy, you’ll need: `10 kWh x 3 days = 30 kWh of battery storage` Depth of Discharge (DoD) Batteries have a depth of discharge (DoD), which refers to how much of the battery’s capacity can be used without damaging its lifespan. For example, if a battery has an 80% DoD, you can only safely use 80% of its total capacity. This needs to be factored in when determining how much storage capacity you actually need. For instance, if you need 30 kWh of usable energy and the battery has a 80% DoD, you’d need: `30 kWh / 0.80 = 37.5 kWh of battery capacity` Types of Batteries for Off-Grid Systems Not all batteries are created equal. Several battery technologies are available for off-grid systems, each with its own pros and cons. The three most common types are lead-acid, lithium-ion, and saltwater batteries.  Lead-Acid Batteries – Pros: Affordable, widely available, proven track record in off-grid systems. – Cons: Lower lifespan, heavy, requires regular maintenance, lower depth of discharge (usually 50%). Lead-acid batteries are the most affordable option for off-grid systems, but they tend to have a shorter lifespan and a lower usable capacity due to their lower DoD. These batteries require regular maintenance and are heavier and bulkier than their counterparts.  Lithium-Ion Batteries – Pros: Higher DoD (80-100%), longer lifespan, lightweight, low maintenance. – Cons: Higher upfront cost. Lithium-ion batteries are increasingly popular in off-grid systems due to their high efficiency and long lifespan. While they are more expensive initially, they tend to be more cost-effective over time due to their reduced maintenance and higher usable capacity.  Saltwater Batteries – Pros: Environmentally friendly, non-toxic, 100% DoD. – Cons: Expensive, less widely available. Saltwater batteries are emerging as an environmentally friendly option for energy storage. They offer a high DoD and are non-toxic, making them a great choice for those looking to minimize their environmental impact. However, they are still relatively new and come with a higher price tag. Inverter Sizing and Compatibility with Batteries Inverters play an essential role in off-grid systems by converting the direct current (DC) stored in batteries into alternating current (AC), which is used by most household appliances. When choosing your battery storage system, it’s important to ensure compatibility with your inverter.  Inverter Sizing Your inverter needs to be able to handle the peak power demand of your system. For example, if your combined appliance power draw at any given time is 5 kW, you’ll need at least a 5 kW inverter. However, it’s usually a good idea to size up for safety, so a 6-7 kW inverter may be a better choice.  Battery Voltage and Inverter Compatibility Make sure your batteries match the voltage of your inverter. Most off-grid systems use either 12V, 24V, or 48V batteries, and your inverter should be compatible with the voltage of your battery bank. Optimizing Battery Life and Performance Batteries are one of the most expensive components of an off-grid system, so ensuring their longevity and performance is crucial for reducing costs over time. Here are some best practices for optimizing your battery life.  Avoid Overcharging and Over-Discharging Overcharging and over-discharging can significantly reduce the lifespan of your batteries. To prevent this, your system should include a charge controller that regulates the flow of electricity to and from the batteries. This helps prevent overcharging, which can damage the battery, and ensures that the battery doesn’t discharge beyond its DoD limit.  Temperature Management Batteries are sensitive to extreme temperatures. Most batteries work best at moderate temperatures, around 77°F (25°C). In very hot or cold climates, it may be necessary to install insulation or ventilation

Off-Grid Systems
Charge Controller

Why Your Charge Controller Is So Important in Off-Grid Systems

In an era where more people are looking for energy independence, sustainability, and cost-effective power solutions, off-grid solar systems have become increasingly popular. These systems allow individuals and businesses to generate their own electricity, reducing reliance on traditional power grids. However, an essential component that is often overlooked in off-grid systems is the charge controller. This seemingly small device plays a critical role in ensuring the smooth and efficient operation of the entire system. In this blog, we’ll explore what a charge controller is, how it works, why it’s so important, and the different types available to help you make the best decision for your off-grid system. What is a Charge Controller? A charge controller, also known as a solar charge regulator, is a key component in any off-grid solar energy system. Its primary job is to regulate the voltage and current coming from the solar panels to the batteries to prevent overcharging or excessive discharge, which can significantly reduce the lifespan of the batteries. Without a charge controller, your batteries could receive too much energy, resulting in overcharging, which can damage them beyond repair. Conversely, the controller ensures that energy is not drained excessively, protecting the batteries from discharging too deeply. These two functions are vital for the longevity and efficiency of your off-grid system. How Does a Charge Controller Work? A charge controller acts as a bridge between the solar panels and the battery bank, ensuring that the correct amount of power is being transferred. Solar panels generate varying amounts of electricity depending on sunlight exposure, temperature, and other environmental conditions. This electricity comes in the form of DC (Direct Current), which flows to the batteries for storage. The role of the charge controller is to monitor this flow, ensuring that the battery bank does not overcharge or discharge beyond safe levels. It operates by reducing the amount of current sent to the batteries when they are close to full charge and by cutting off the flow of energy once the battery bank is fully charged. Key Functions of a Charge Controller in Off-Grid Systems The importance of a charge controller in off-grid systems cannot be overstated. Here are some key functions that demonstrate why this component is essential: Prevents Battery Overcharging One of the most critical functions of a charge controller is to prevent overcharging. When batteries are overcharged, it leads to excessive heat, gassing, and eventually, battery failure. This is particularly important with lead-acid batteries, which can be permanently damaged by overcharging. The charge controller regulates the flow of electricity to the battery, ensuring that the charging process stops when the battery reaches its maximum charge. Prevents Battery Over-Discharge A charge controller also ensures that the batteries do not discharge beyond a certain level. Over-discharging batteries can lead to a significant reduction in their lifespan, and in the worst case, they can become permanently damaged. The controller monitors the battery’s state of charge (SOC) and cuts off power to the system if the SOC falls below a safe threshold. Voltage Regulation Solar panels typically produce a higher voltage than what the battery can safely handle. The charge controller ensures that the voltage sent to the battery is within safe operating limits. If the voltage is too high, it can lead to battery damage and excessive heat generation. Power Efficiency High-quality charge controllers can increase the overall efficiency of your off-grid system. They reduce power loss during the energy transfer process, ensuring that more of the energy generated by your solar panels gets stored in the battery bank. This is especially important in smaller or budget-conscious off-grid systems where maximizing power efficiency is key. Monitoring and Reporting Most modern charge controllers come equipped with monitoring features that allow you to track the health and performance of your solar power system. They often include digital displays or can be connected to mobile apps to provide real-time data on battery voltage, charging current, and power output. These features enable you to manage your system more effectively and respond to any issues before they become major problems. Types of Charge Controllers When choosing a charge controller for your off-grid system, it’s essential to understand the different types available and how they affect the overall efficiency and performance of your system. The two main types of charge controllers are PWM (Pulse Width Modulation) and MPPT (Maximum Power Point Tracking). PWM (Pulse Width Modulation) Charge Controllers PWM controllers are the simpler and more affordable option. They work by slowly reducing the amount of power going into the battery as it approaches full charge, which helps prevent overcharging. The downside to PWM controllers is that they are less efficient compared to MPPT controllers, especially in colder climates or when the solar panel voltage is much higher than the battery voltage.  Advantages of PWM Controllers: – Lower cost compared to MPPT controllers – Durable and reliable for small-scale systems – Easy to install and maintain  Disadvantages of PWM Controllers: – Less efficient energy conversion – Not ideal for large or high-voltage systems – Poor performance in less-than-optimal weather conditions MPPT (Maximum Power Point Tracking) Charge Controllers MPPT controllers are more advanced and efficient than PWM controllers. They continuously track the optimal power point of the solar panels, adjusting the voltage and current to maximize the amount of energy transferred to the batteries. MPPT controllers are especially beneficial in systems with higher solar panel voltages or in environments with varying weather conditions.  Advantages of MPPT Controllers: – Higher energy conversion efficiency (up to 30% more than PWM) – Ideal for large or high-voltage systems – Better performance in cloudy or cold conditions – Can work with a wider range of solar panels  Disadvantages of MPPT Controllers: – More expensive than PWM controllers – Slightly more complex installation and maintenance – Larger in size, making them less suitable for compact systems Why Is the Charge Controller So Important? Given the wide range of functions that the charge controller performs, its importance in an off-grid system

Sign Lighting Kit - SunInOne
Solar Powered

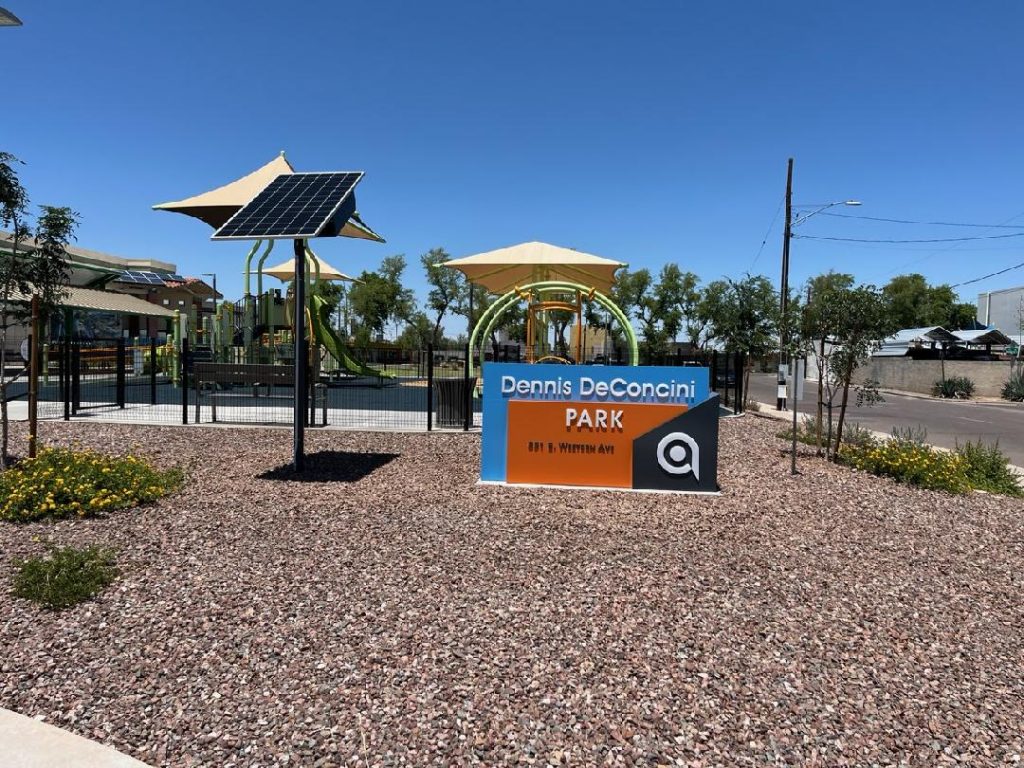
Can You Integrate Solar Into Your Sign? What You Need to Know

Many businesses and individuals are looking for innovative ways to reduce their environmental footprint. One method gaining traction is integrating solar panels into signage. Solar-powered signs offer several benefits: they reduce energy costs, provide a reliable power source in remote locations, and contribute to a greener future. But is it feasible to integrate solar power into your sign? What factors do you need to consider, and what are the potential challenges? In this comprehensive guide, we’ll answer these questions and provide you with everything you need to know about solar-powered signage. Why Consider Solar for Your Signage? Before diving into the technical aspects, it’s essential to understand why solar power is an excellent option for signage. Here are some of the key advantages:  a. Energy Independence Solar-powered signs operate independently of the grid, which means you won’t need to worry about electricity costs or being affected by power outages. This is especially useful for signs in remote areas where electrical infrastructure may not be readily available.  b. Cost Savings While the initial investment for solar-powered signs can be higher than traditional signage, the long-term savings are significant. By generating your own power from the sun, you eliminate ongoing electricity bills. Over time, the savings from energy bills can outweigh the upfront cost of solar integration.  c. Environmental Benefits Integrating solar panels into your signage is a fantastic way to reduce your carbon footprint. Solar energy is a clean, renewable source of power that doesn’t produce harmful emissions or contribute to global warming. For eco-conscious businesses, using solar signage can demonstrate a commitment to sustainability, attracting customers who value green practices.  d. Remote Applications If your sign is located far from conventional power sources—on highways, in rural areas, or in places with limited infrastructure—solar power offers a practical and reliable solution. In these locations, running electrical lines can be expensive and logistically challenging, making solar energy a viable alternative. 2. Types of Solar-Powered Signs Solar-powered signs come in various forms, depending on the intended use and location. Each type has specific features and benefits that suit different applications.  a. Illuminated Solar Signs These are the most common types of solar-powered signs, designed to illuminate text, logos, or graphics. Illuminated solar signs use solar panels to store energy in batteries during the day, which is then used to power LED lights at night. They are perfect for businesses, public spaces, or roadways where visibility after dark is critical.  b. Non-Illuminated Solar Signs Non-illuminated solar signs rely solely on natural light and do not require electricity. While they don’t feature internal lighting, they may include small solar-powered lighting fixtures to enhance visibility at night. These signs are ideal for daytime use or in areas where constant lighting isn’t necessary.  c. Digital Solar Signs Digital signage has become increasingly popular for displaying dynamic content. Solar-powered digital signs can showcase advertisements, important public information, or interactive messages. While these systems consume more energy than standard illuminated signs, advancements in energy-efficient displays and solar panel technology have made this option more feasible.  d. Traffic and Safety Signs Solar-powered traffic signs are widely used in urban and rural environments, often providing critical information like speed limits, road warnings, or pedestrian crossings. Because these signs need to be visible and functional 24/7, solar energy with battery backup offers an efficient and reliable solution. 3. Factors to Consider When Integrating Solar Into Your Sign If you’re interested in integrating solar into your signage, there are several factors to consider. These will help you determine if solar is a practical and cost-effective solution for your specific needs.  a. Location and Sunlight Availability Solar panels rely on sunlight to generate electricity, so the location of your sign plays a significant role in determining its efficiency. Consider the following: – Sunlight Exposure: The more direct sunlight your solar panels receive, the more power they will generate. Locations with plenty of southern exposure are ideal for solar-powered signs. – Shading: Trees, buildings, and other structures can block sunlight and reduce the efficiency of your panels. It’s crucial to assess potential shading issues when choosing the location for your solar-powered sign. – Climate: Areas with frequent cloud cover, rain, or snow may not generate as much solar energy, impacting the performance of the system. However, solar panels can still generate electricity on cloudy days, though at reduced capacity.  b. Size and Energy Requirements of the Sign The size of your sign and the amount of power it consumes are critical factors in determining the number of solar panels and batteries you’ll need. Illuminated signs with large surface areas, or those with bright LED lights, will require more energy than smaller, non-illuminated signs. Here’s what to consider: – Power Consumption: Calculate the total wattage your sign requires. This includes the lights, any electronic components, and digital displays if applicable. – Battery Capacity: Solar-powered signs often store energy in batteries for nighttime operation. You’ll need enough battery capacity to keep your sign illuminated after sunset. The capacity required will depend on the number of hours the sign needs to stay lit and the energy consumption during those hours. – Solar Panel Size: Larger or more energy-demanding signs will need more solar panels to generate sufficient electricity. The panels should be appropriately sized to meet the energy requirements of your sign during both sunny and cloudy conditions.  c. Battery Backup and Storage A reliable battery storage system is essential for solar-powered signs, especially those that need to operate continuously. Most solar signs use deep-cycle batteries that are designed to store energy and release it slowly over time. When choosing a battery system, consider the following: – Battery Type: The most common types of batteries used in solar systems are lead-acid and lithium-ion. While lead-acid batteries are more affordable, lithium-ion batteries offer a longer lifespan, higher efficiency, and require less maintenance. – Capacity: The battery should have enough capacity to store energy for several hours of operation. In regions with short daylight hours or long winter nights,

Internally lite signs with solar
Internal Light Signs

Can You Power Internal Light Signs with Solar? What You Need to Know

Solar energy is rapidly gaining popularity as a renewable and sustainable power source. Whether you’re an individual looking to reduce your carbon footprint or a business aiming for energy efficiency, one question arises: can you power internal light signs with solar energy? The short answer is yes, but there are several factors to consider to ensure the process is efficient and cost-effective. We will explore how solar energy can be harnessed to power internal light signs, the essential equipment you’ll need, the benefits and challenges, and how to ensure a seamless transition to solar-powered signage. By the end of this guide, you’ll have a comprehensive understanding of how to implement solar power for your internal signs. Understanding Solar Power for Internal Signage Before diving into the practicalities, it’s important to understand how solar power works in the context of lighting. Solar energy systems consist of several components: – Solar Panels: These capture sunlight and convert it into direct current (DC) electricity. – Inverter: Converts the DC electricity generated by the solar panels into alternating current (AC), which most internal lights use. – Battery Storage: Stores excess energy for use when sunlight is insufficient, such as during cloudy days or nighttime. – Charge Controller: Regulates the energy going to the batteries to prevent overcharging or damage. To power internal light signs, the solar system must be designed and installed to meet the energy demands of the sign. How Do Solar Panels Work for Internal Light Signs? Solar panels are typically placed outside where they can collect the maximum amount of sunlight. They convert sunlight into electricity, which can either be used immediately or stored in a battery for later use. For internal light signs, this energy is directed into the sign’s lighting system. If your signage is placed in a well-lit room or area that doesn’t rely heavily on artificial light during the day, the system may draw less power from the solar panels. However, for spaces that rely heavily on illuminated signage, especially at night, you’ll need efficient energy storage and the right size of panels to accommodate this need. Key Considerations Before Transitioning to Solar-Powered Signs Location and Sunlight Exposure The efficiency of a solar-powered internal light sign largely depends on the location of your building and the amount of sunlight it receives. Ideally, solar panels should be installed in an area with high sun exposure. The amount of sunlight your panels receive will determine how much energy they can produce and store. For example, in locations that receive minimal sunlight, particularly during the winter months, you may need to install more panels or a larger battery to ensure that your internal signs remain consistently powered. Size and Power Needs of the Sign The size and type of internal sign you want to power with solar energy are critical factors. Larger signs or signs with more complex lighting (such as LED displays) will require more energy. On the other hand, smaller, simple signs will need less power. To determine the exact power requirements, calculate the wattage of your light sign. This information can be used to size your solar panel system accordingly. Solar systems are rated based on their wattage, and you’ll want to ensure the system you choose can generate and store enough power to meet the needs of your sign.  Battery Storage Capacity Internal light signs often need to remain illuminated after the sun goes down, making battery storage essential. A good battery system will allow you to store excess energy generated during the day to power your signs at night or during periods of low sunlight. The size of the battery you need depends on the total daily energy consumption of your sign and how many hours it needs to remain powered after daylight hours. If you’re in an area with long nights or frequent cloudy weather, investing in a larger battery will help keep your signs operational. Cost and Return on Investment The initial cost of solar panels, inverters, and battery systems can be significant, but it’s important to view this as an investment. Over time, solar-powered signs will reduce or even eliminate electricity costs associated with running your internal signs. You should also consider any local incentives, tax credits, or rebates that can help offset the initial cost of installing a solar system. Depending on your location, you may find that solar-powered signage offers a relatively quick return on investment. Benefits of Solar-Powered Internal Signs Energy Efficiency and Reduced Costs Once installed, solar-powered internal light signs can save you money on electricity bills. By harnessing the sun’s power, you’ll no longer be dependent on conventional energy sources. Over time, this reduction in energy consumption can result in significant cost savings. Environmentally Friendly Solar energy is a clean and renewable energy source. By switching to solar-powered signs, you’re reducing your carbon footprint and contributing to a more sustainable future. This is particularly important for businesses looking to improve their green credentials and appeal to environmentally conscious consumers. Reliable Backup During Power Outages With a battery storage system, your internal signs can continue functioning even during power outages. This can be especially beneficial in areas prone to grid instability or natural disasters. Solar-powered signs offer a reliable backup, ensuring that your signage remains visible in times of need. Low Maintenance Solar systems generally require very little maintenance once they are installed. Solar panels need to be cleaned occasionally to remove dust or debris that could block sunlight, but other than that, the upkeep is minimal. Battery systems should be checked periodically, but they are built to last for many years. Challenges of Using Solar Power for Internal Signs Initial Installation Costs As mentioned earlier, the upfront cost of installing solar panels, batteries, and other necessary equipment can be high. While these costs will be recouped over time, they can be a barrier for businesses or individuals who don’t have the budget for a solar investment. Space Requirements for Panels Solar panels need to be placed

Solar Carport Lighting Kits
Carport Lighting

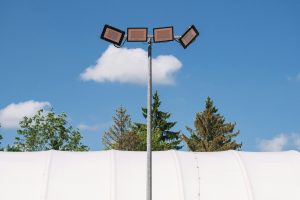
What Are Your Options in Lighting Carports?

Carports are essential structures that protect vehicles from the elements, but they often lack sufficient lighting to ensure convenience, safety, and security during nighttime hours. Whether you’re looking to illuminate a residential carport or one in a commercial setting, finding the right lighting solution is crucial. Proper lighting enhances visibility, deters potential intruders, and makes it easier to navigate during the evening or early morning. But what are the best options for lighting a carport? We’ll explore the various options available for lighting carports, including traditional, solar-powered, and LED lighting solutions. We’ll also cover important considerations like energy efficiency, installation methods, and how to choose the right lighting for your specific needs. By the end of this guide, you’ll have a clearer understanding of how to create a well-lit, safe, and aesthetically pleasing carport. Why Carport Lighting Matters Carports serve as a protective structure for vehicles, but they can also be an entry point to your home or business, making lighting a critical aspect of both convenience and safety. Without adequate lighting, carports can become dark and unwelcoming, potentially posing a security risk. Properly installed lighting can help in several key areas: Safety: Adequate lighting helps you safely park and navigate around your carport, preventing tripping hazards or accidents. Security: Well-lit areas are less attractive to thieves or vandals, as visibility increases the likelihood of being seen. Aesthetic Appeal: Lighting can enhance the overall appearance of your property, creating an inviting space. Functionality: Lights allow you to use your carport more effectively, whether you’re arriving late at night or working on your vehicle after dark. Types of Lighting Options for Carports When it comes to carport lighting, there are several options to choose from, each offering unique advantages in terms of cost, efficiency, installation, and light quality. Below are some of the most popular lighting solutions available for carports. Traditional Hardwired Lighting Hardwired lighting is one of the most reliable options for carports. This type of lighting is connected directly to your home or business’s electrical system, providing a steady and consistent source of illumination. Here are some common types of hardwired lighting that work well for carports: – Flush Mount Ceiling Lights: These are typically mounted directly to the ceiling of the carport and provide overhead lighting. They are ideal for evenly distributing light throughout the carport. – Pendant Lights: For a more decorative and modern look, pendant lights can be hung from the ceiling. They provide direct downward lighting and are often used in both residential and commercial carports. – Wall-Mounted Sconces: Wall-mounted lights can be installed on the sides of the carport for additional lighting. These sconces provide accent lighting and improve the overall visibility of the carport area. – Floodlights: If security is a priority, floodlights are an excellent option. They provide bright, wide-angle lighting that covers a larger area, making them effective at deterring intruders. Pros: – Reliable, with a constant power source – Can be integrated with timers or motion sensors for better control – Wide variety of design and wattage options Cons: – Requires professional installation, which can be costly – Increases your electricity bill, depending on usage – Limited by the location of existing electrical wiring Solar-Powered Lighting Solar-powered lights have become a popular alternative to traditional hardwired lighting, especially for outdoor structures like carports. These lights are powered by energy from the sun, stored in batteries, and used to illuminate the carport at night. They’re available in various styles, from ceiling-mounted lights to freestanding lamp posts. – Solar Floodlights: Like hardwired floodlights, solar-powered floodlights provide wide-angle lighting for large areas. Many solar floodlights come with motion detectors to conserve battery life and provide light only when needed. – Solar Wall Lights: These compact lights can be mounted on the sides of the carport and provide sufficient lighting without requiring any electrical work. – Solar Ceiling Lights: Ceiling-mounted solar lights are ideal for carports, providing overhead lighting without the need for hardwiring. Pros: – No need for electrical wiring, making installation easier and more cost-effective – Environmentally friendly, using renewable solar energy – Can significantly reduce electricity costs – Often include motion sensors to conserve energy Cons: – Performance depends on the amount of sunlight received, so they may not be ideal for carports in shaded areas – May not provide as much brightness as hardwired options – Battery replacement or maintenance might be required over time LED Lighting LED (Light Emitting Diode) lights have become a go-to solution for energy-efficient lighting. Known for their durability and long lifespan, LED lights are a practical choice for carports, especially if you’re looking for bright and reliable illumination. LED lights can be used in both hardwired and solar-powered setups, giving you flexibility in design and installation. – LED Floodlights: LED floodlights offer powerful, directional lighting that can cover large areas. They can be used for both security and visibility purposes. – LED Strip Lights: If you want to create a modern, sleek look for your carport, LED strip lights can be installed along the ceiling or walls. They provide continuous lighting and can even be used for aesthetic effects by choosing different color temperatures or hues. – Motion Sensor LED Lights: These lights automatically turn on when motion is detected, providing security and conserving energy. Pros: – Extremely energy efficient, consuming less power than traditional incandescent or fluorescent lights – Long-lasting, with some LED lights lasting up to 50,000 hours – Available in various brightness levels and color temperatures – Can be paired with motion sensors for added security Cons: – Higher initial cost compared to other types of lighting, though the long-term savings usually outweigh this – Some LED lights can be too bright or harsh if not chosen carefully – Light quality can vary depending on the brand and model Motion Sensor Lighting Motion sensor lighting is an excellent choice for carports, especially if you’re concerned about energy efficiency or security. These lights only turn on when movement is detected within

Solar-powered signs
Solar Powered

Why the Quality of Your Lighting Important Even If It is Solar-Powered?

When people hear about solar-powered lighting, they often focus on its eco-friendliness and energy-saving benefits. Solar energy is a renewable, sustainable power source that helps reduce electricity costs and carbon footprints. However, while solar-powered lighting has numerous advantages, the quality of the lighting itself remains a crucial consideration, no matter how it’s powered. Poor lighting quality can negatively impact health, productivity, safety, and overall experience, making it just as important as the source of the energy. We’ll dive into why the quality of your lighting matters even when using solar power, exploring aspects like brightness, color temperature, efficiency, safety, aesthetics, and its impact on health and the environment. Brightness and Lumen Output Matter One of the most important aspects of lighting quality is brightness. Whether your lights are solar-powered or connected to the grid, they must be bright enough to illuminate the intended area effectively. Solar-powered lights often have limited wattage compared to traditional lights, but they can still offer adequate illumination if chosen correctly. Brightness is typically measured in lumens, and a higher lumen count indicates a brighter light. The quality of solar-powered lights depends on whether they can produce the necessary lumens for the space they illuminate. Low-quality solar lights may struggle to offer sufficient brightness, particularly if they use cheaper materials or components, leading to dimly lit areas that compromise visibility. Without adequate brightness, tasks like reading, working, or even navigating through a space can become difficult and unsafe. For example, a poorly lit driveway or pathway increases the risk of accidents, while dim interior lighting can cause eye strain and fatigue over time. Therefore, ensuring that your solar lighting fixtures deliver the necessary lumens is key to maintaining both safety and functionality. Color Temperature Affects Mood and Functionality Color temperature is another critical factor that affects the quality of lighting. Measured in Kelvins (K), color temperature refers to the warmth or coolness of light. Lower Kelvin ratings produce warmer, yellowish light, while higher Kelvin ratings result in cooler, bluish light. The right color temperature can have a significant impact on how a space feels and functions. Warm lighting (2700K-3000K) is generally more relaxing and is often used in living rooms and bedrooms to create a cozy atmosphere. On the other hand, cooler lighting (4000K-5000K) is ideal for workspaces, kitchens, and bathrooms, as it enhances focus and visibility. Inadequate color temperature choice in solar-powered lighting can negatively affect productivity and comfort. For example, cool lighting in a living room may feel too harsh and unsettling, while warm lighting in an office space can make you feel sleepy or sluggish. Choosing solar-powered lights with adjustable color temperatures or selecting the right fixtures for each area ensures that your lighting serves its purpose effectively. Energy Efficiency and Performance Over Time One of the biggest advantages of solar-powered lighting is energy efficiency, but efficiency doesn’t just mean using less power; it also means maximizing the output relative to the energy consumed. High-quality solar lighting uses better photovoltaic cells, batteries, and LED technology to convert sunlight into usable electricity more efficiently. When using low-quality solar lighting, the efficiency drops significantly. Poor performance over time, inconsistent lighting, or failure to store enough energy for nighttime use are common problems with inferior products. Higher-quality solar lights use efficient batteries and solar cells to store energy for long periods, ensuring consistent illumination throughout the night. Opting for solar lighting with higher energy efficiency not only guarantees better light output but also increases the lifespan of the system, reducing the frequency of maintenance or replacement. In short, high-efficiency solar lights provide better performance and more consistent lighting, delivering value for money and long-term reliability. Safety Concerns with Poor Lighting Quality Good lighting is integral to safety, whether it’s for indoor or outdoor spaces. Insufficient illumination can create safety hazards in many environments. For example, outdoor solar lights that fail to adequately illuminate a driveway, walkway, or parking lot can increase the likelihood of accidents or criminal activities. Even indoors, lighting quality plays a vital role in preventing slips, trips, and falls, especially in areas like staircases and hallways. High-quality solar lights ensure that these areas are well-lit, helping to maintain safety for everyone. It’s also important to note that some low-quality solar lights might not comply with safety standards. Poor construction or inadequate materials can lead to overheating, battery malfunctions, or even fire hazards. Always prioritize quality when purchasing solar-powered lighting fixtures to ensure they meet safety regulations.  Impact on Productivity and Well-being Lighting quality directly influences human health and productivity. Poor lighting can cause a range of issues such as headaches, eye strain, fatigue, and even mood disorders. In work environments, dim or overly bright lights can decrease productivity by causing discomfort and distraction. Solar-powered lighting, when properly designed, can meet the lighting requirements for both comfort and efficiency. High-quality fixtures provide steady, flicker-free light that mimics natural daylight, promoting alertness and concentration. Inadequate lighting, however, can lead to inconsistent illumination or harsh shadows that disrupt focus and create a less conducive work environment. In homes, poor lighting can also affect well-being. Improper color temperature and inadequate brightness can disrupt circadian rhythms, affecting sleep patterns and overall mood. Installing high-quality solar-powered lighting that closely mimics natural light ensures a healthier, more comfortable living environment. Aesthetics and Design Influence Perception Lighting quality also affects the overall aesthetic of a space. Whether indoors or outdoors, good lighting enhances the appearance of any area, highlighting architectural features and creating an inviting atmosphere. Solar-powered lighting has evolved significantly in terms of design, offering a wide range of styles to suit different aesthetics. From sleek, modern designs to rustic, decorative options, the right lighting can elevate the ambiance of any space. However, inferior lighting can detract from the overall design. Low-quality solar lights often have inconsistent brightness, unsightly fixtures, or poorly distributed light patterns that can make a space feel unwelcoming or poorly maintained. Investing in aesthetically pleasing and well-designed solar lighting enhances the visual appeal of your

Solar Equipment Mounting on Poles - SunInOne
Mounting Poles

Why is EPA important for solar equipment mounting on poles?

What is EPA (Effective Projected Area)? While a little technical, this is nonetheless very relevant when it comes to Solar outdoor lighting, Solar Lighting, or solar security camera mounting, and most particularly to its structural aspect. The concept in question is what we call the Effective Projected Area (EPA) and its wind force on objects, i.e., the wind forces on the solar panel and battery boxes, which then cause forces on the pole. Effective Projected Area (EPA) is one of the basic principles of the structural engineering process in outdoor lighting, solar mounting, and other mechanical engineering fields. EPA measures a three-dimensional object on a two-dimensional area. EPA is used in many applications, including solar lighting systems, solar security racking for security cameras, and solar racking design, construction, and installation. The EPA is calculated to help determine the pole’s strength needed to support the solar lighting system during wind events. This calculation considers the entire area that the solar power system and light fixture will take up at the top of a pole and helps structural engineers and manufacturers determine the size of the pole. The type of anchors used, the embedment and foundations used at installation, and the brackets required to keep everything mounted during a high wind event. EPA and AASHTO Standards are used when calculating the requirements for the pole used in any solar lighting or power system application. These two factors determine the pole’s size and thickness required to ensure that the light solar and battery will still stand up to a certain mile per hour after a wind event. The EPA of any system varies depending on the angles, shapes, and sizes of the system components. Even the shape of the pole can change the EPA of a complete system, as square poles have a more significant EPA than round poles. When designing a solar power and lighting system, the angle of the system affects both the EPA and the solar power production of the system. All these factors must be taken into consideration when designing a project and ensuring the installation will withstand for years to come. So why does this all matter? When designing a system, the EPA of the complete system must be considered to ensure that the solar power assembly will not blow apart during a storm, the pole won’t be knocked over due to the large area at the top of the pole, etc. To find local AASHTO wind load ratings, look online or talk to your pole manufacturer, solar lighting specialist, or local engineering firm. Weather is very regional, and a local structural engineer will have the most knowledge of the soil and the microclimates that can affect the calculations. Different locations, such as mountainous areas, coastal areas, and areas around the Great Lakes, have different wind speed requirements than other inland areas. Consulting a local authority is the best way to ensure you purchase equipment that can withstand these windy areas. The best way to determine the requirements of the project is to: The EPA is the projected area combined with the appropriate drag coefficient. What needs to be mentioned here is that depending on the size and shape of the object, the drag coefficient will vary. The drag coefficient can be defined as the resistance created by the object or shape in a fluid environment, in our case (outdoor solar lighting and power kits) air. The lower the drag coefficient, the less resistance the object will create. An example is often the best way to understand a technical concept such as this one. Take two basic forms: a round surface object (drag coefficient of 0.5 according to the latest version of AASHTO LTS-5 table 3-6) and a rectangular shape object (drag coefficient of 1.2 according to the newest version of AASHTO LTS-5 table 3-6). The rectangular object will create around 60 % more resistance for the same area than the round object. This information is needed to calculate the wind force acting on an object and the overall structure. Only by knowing the EPA value for each object and their respective weight can the proper pole be calculated and designed accordingly. The wind force acting on an object is calculated by multiplying the EPA and the velocity pressure of the wind (this designed wind pressure is computed by a specific standard). In our case, we use the equation 3-1 in the AASHTO Standard specifications for structural supports for highway signs, luminaires, and traffic signals. These designed wind pressures are usually based on 50 years of studies or other methods, depending on the standard used. Another important detail is that using the proper wind speed, or wind pressure, should not be taken lightly since, in some cases, the force projected by the wind on an object can be many times the value of its weight. A perfect example of this is a banner. This kind of object is exceptionally light, about 25 to 30 lbs, but depending on its size and geographical location (wind pressure or wind speed), the object in question can create, in some cases, more than 400 lbs of force. In such cases, Suninone strongly recommends that a qualified professional local engineer be consulted for adequately designing and selecting poles and foundations. If you are still unsure, engineering calculations should be performed locally. These typically are a small fee ranging from $500 – $1000 for signed and sealed calculations. A third-party engineering firm performs these calculations. In the end, talking to your manufacturer and local engineering firm will help you determine what size and type of pole will ensure your equipment will withstand local wind events. Learning about different options regarding poles will also educate you on the final decision regarding system design.

Get A Free Quote for Solar Lights and Power Products

Our Best Sellers

Our solar products are designed and tested to withstand harsh environments and extreme operating conditions. They account for everything from local weather conditions to regional solar absorption rates to ambient light issues.